Our Giggle experience widgets can be seamlessly integrated into almost any content management system. Whether you use WordPress, Typo3, Contao, Webflow, or Wix – it’s simple and fast.
This article shows you how to insert your widget codes step by step in the most common systems.
🧩 General Instructions (for all CMS)
Every CMS lets you add custom HTML code – typically via a “+”, “Add element”, or “New section” button.
👉 Simply choose an element like “HTML”, “Embed”, or “Raw HTML”, then paste your widget code into the field provided.
💻 Step-by-Step by CMS
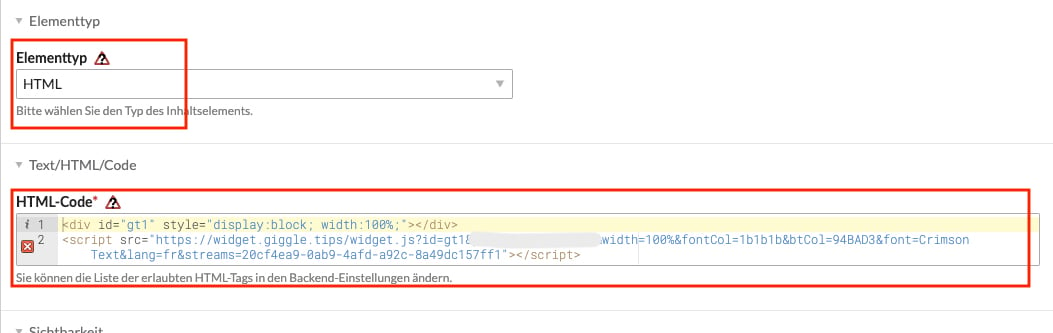
🟠 Contao
-
Click “New element”
-
Select “HTML” as the element type
-
Paste the widget code into the “HTML code” field
-
✅ Save and publish – done!
🔵 WordPress
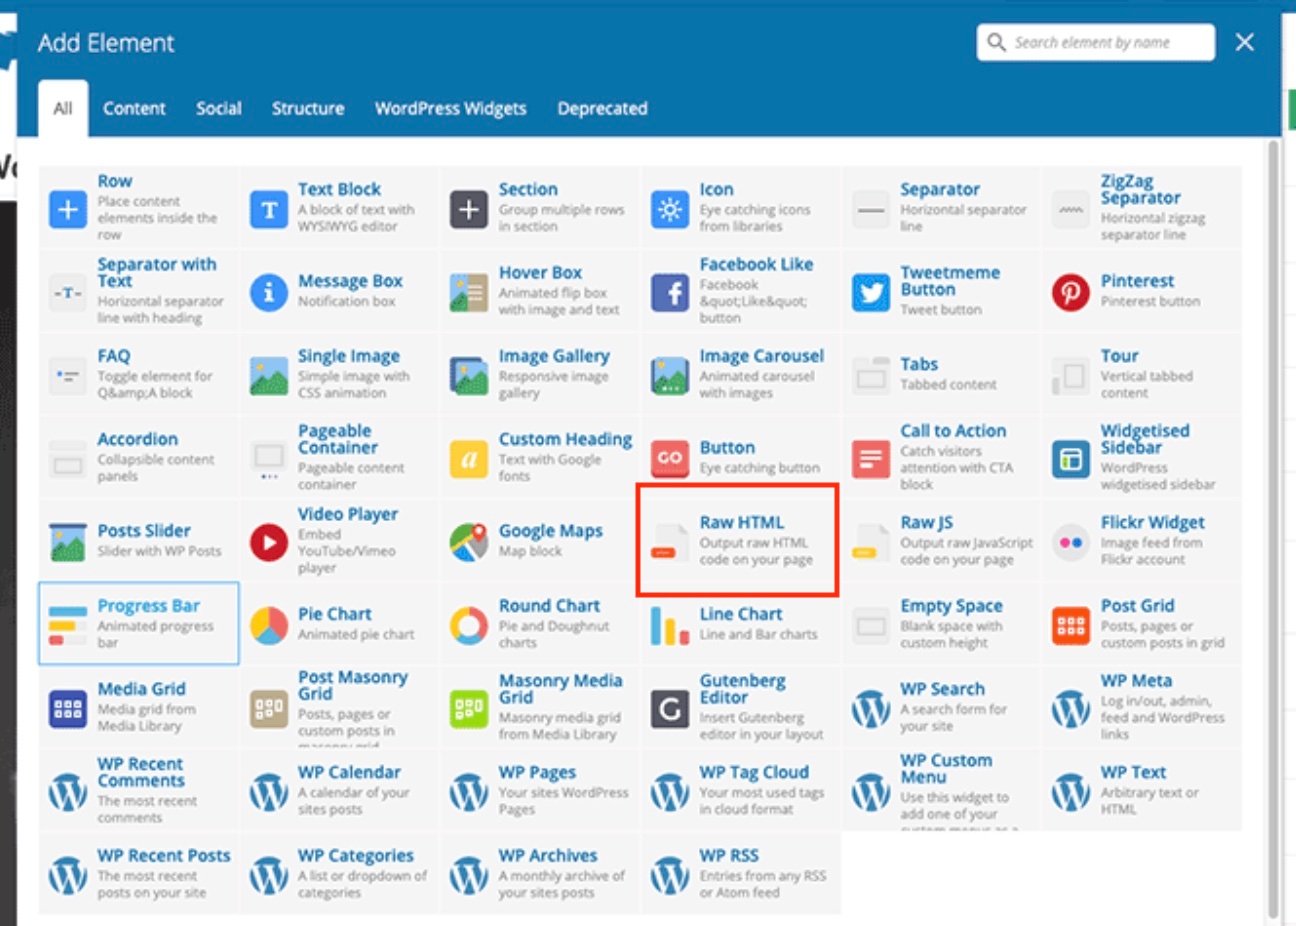
Using WPBakery Page Builder:
-
Click the “+” at the desired location
-
Choose “Raw HTML” in the pop-up
-
Paste in your widget code
- ✅ Save and publish – done!
Using Elementor:
-
Select the “HTML” widget from the sidebar
-
Drag and drop it where needed
-
Paste your widget code into the HTML box
- ✅ Save and publish – done!

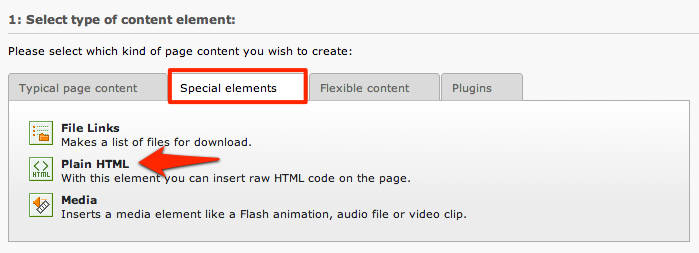
🟣 Typo3
-
Click the “+” to add a new element
-
Under “Special Elements,” select “Plain HTML”
-
Paste the widget code into the field
- ✅ Save and publish – done!
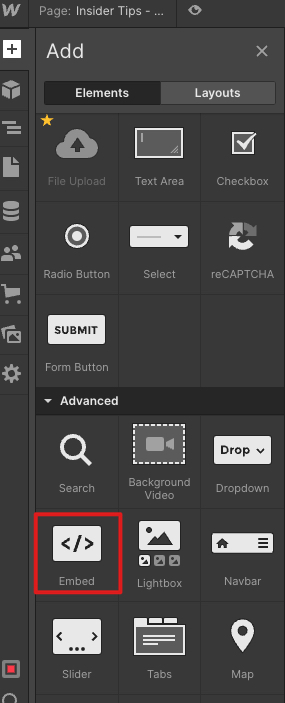
🟢 Webflow
-
Click the “+” (Add Panel)
-
Under “Advanced”, choose “Embed”
-
Paste in your widget code
- ✅ Save and publish – done!
🟡 Wix
-
Go to “+” → “Embed” → “Embed HTML”
-
Place the element on your page
-
Paste the widget code into the field
📌 Important for Wix:
Since Wix uses an iFrame, we recommend opening experiences in a new tab for the best display:
🔧 Add the following to the widget code:
&experiencesNewTab=true
📎 More Useful Guides:
❓Need Help Embedding Your Widget?
Our support team is happy to help:
📩 hello@giggle.tips